Many AWS customers already use EMR to run their Spark clusters. If you’re not familiar with EMR, it’s a simple way to get a Spark cluster running in about ten minutes.
In this post, I’ll walk you through creating an EMR cluster backed by Apache Iceberg tables. If you’re unfamiliar with Iceberg, it’s a table format for analytic datasets
that can integrate with an ever-growing number of compute engines. Along with high-performance queries on data at rest, it comes with a ton of features that enable data
professionals to effectively manage big data, even up to tens of petabytes in size.
- Creating an EMR Cluster
- A Closer Look at the Configuration
- Creating a Notebook
- Loading Data
- Row-Level Updates
- Time Travel
Creating an EMR Cluster
To create the EMR cluster, use the advanced create cluster setup menu found here.
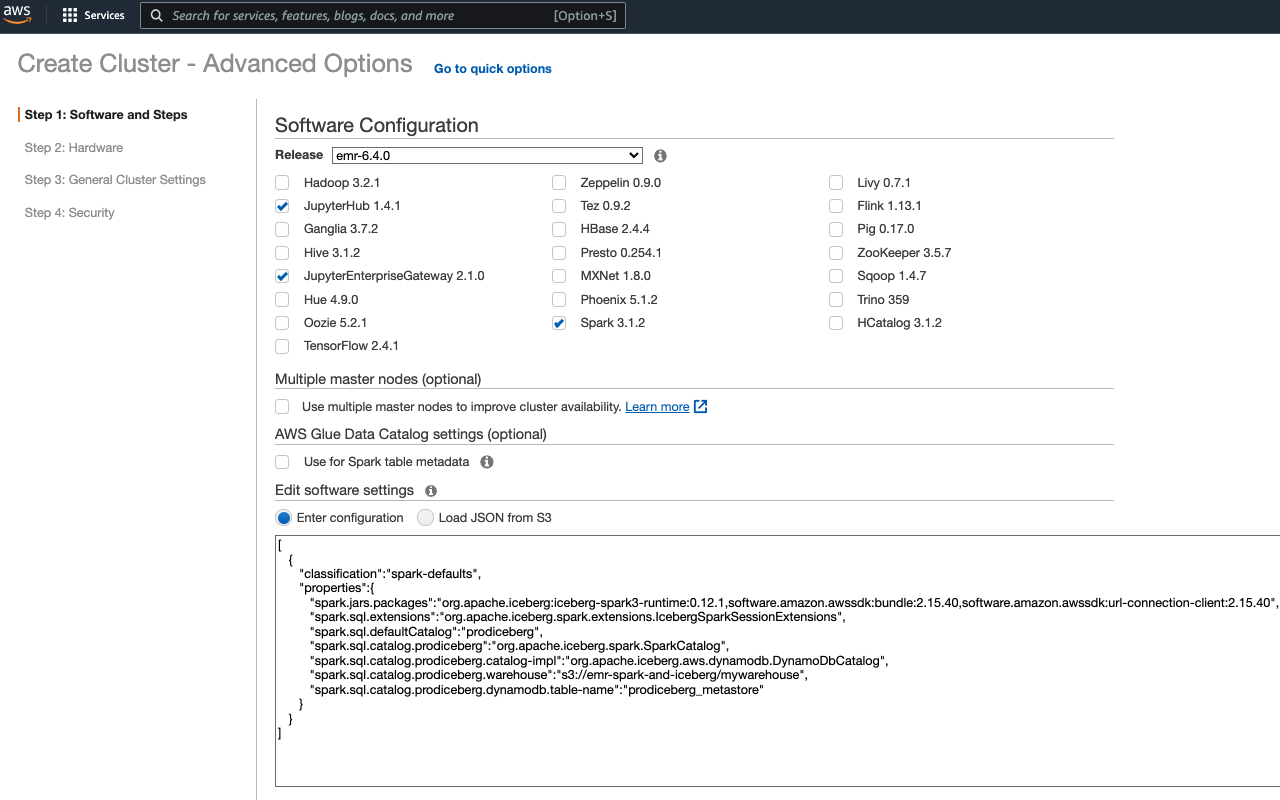
Don’t worry; we’ll only have to set a couple of things here. First, switch the EMR version to 6.4.0 in the drop-down selector. Next, check the box for all of the following applications
to include them in the cluster:
• Spark 3.1.2
• JupyterHub 1.41
• JupyterEnterpriseGateway 2.1.0
In the “Edit software settings” section, enter the following configuration into the text box. Remember to replace<Your S3 Warehouse Path> with a path to the location on S3 that you want to use for your warehouse, e.g.s3://emr-spark-and-iceberg/mywarehouse:
[
   {
      "classification":"spark-defaults",
      "properties":{
        "spark.jars.packages":"org.apache.iceberg:iceberg-spark3-runtime:0.12.1,software.amazon.awssdk:bundle:2.15.40,software.amazon.awssdk:url-connection-client:2.15.40",
        "spark.sql.extensions":"org.apache.iceberg.spark.extensions.IcebergSparkSessionExtensions",
        "spark.sql.defaultCatalog":"prodiceberg",
        "spark.sql.catalog.prodiceberg":"org.apache.iceberg.spark.SparkCatalog",
        "spark.sql.catalog.prodiceberg.catalog-impl":"org.apache.iceberg.aws.dynamodb.DynamoDbCatalog",
        "spark.sql.catalog.prodiceberg.warehouse":"<Your S3 Warehouse Path>",
        "spark.sql.catalog.prodiceberg.dynamodb.table-name":"prodiceberg_metastore"
      }
   }
]
Your options should now look like this.
In the “General Cluster Settings” section, provide a name for the cluster. I’ve chosen “Iceberg on EMR.”
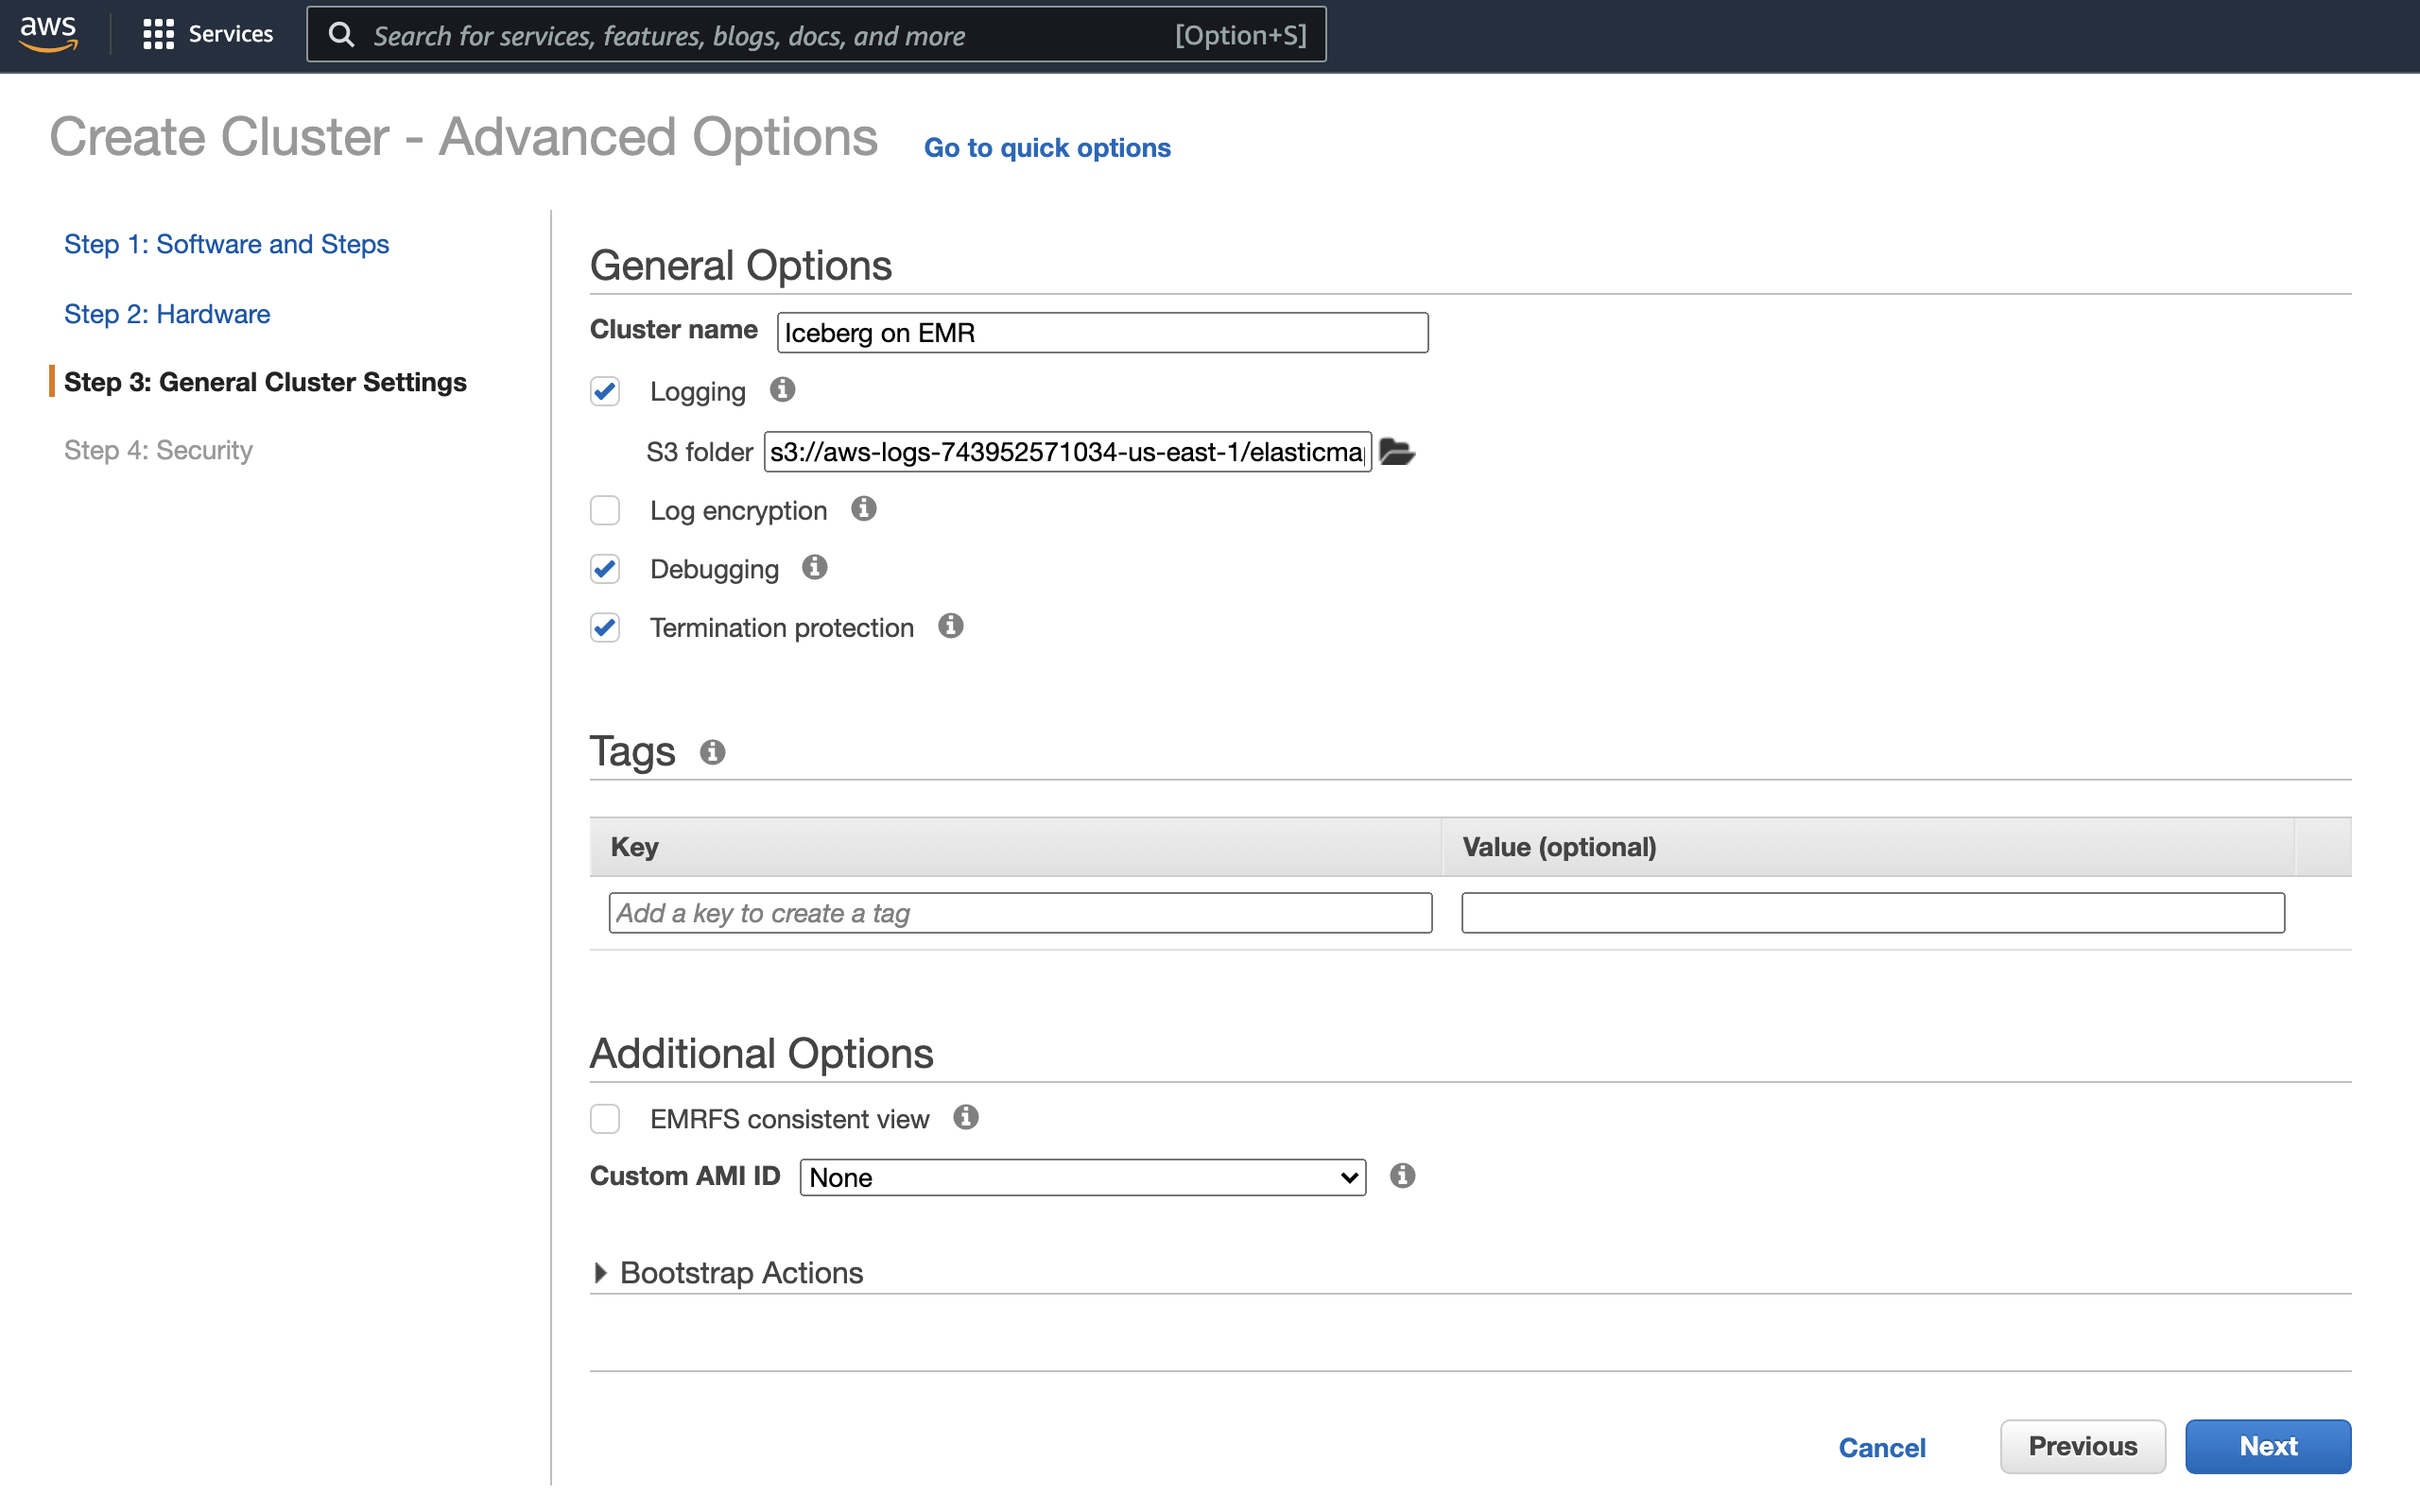
For the rest of the options, you can leave the defaults. Just click “Next” through the rest of the sections, and at the end, click “Create Cluster.”
That’s it! After about ten minutes, you’ll have everything you need to start reading and writing data between your EMR compute engines and your data warehouse powered by Iceberg.
A Closer Look at the Configuration
While we’re waiting on the cluster to start, let’s take a moment to cover our setup in a bit more detail. The config block you pasted above sets up Spark
configuration to do three things:
- Include Iceberg’s runtime Jar
- Create an Iceberg table catalog
- Enable Iceberg’s SQL extensions
spark.jars.packages
In this property, we added the Iceberg 0.12.1 runtime for Spark 3 as well as a recent AWS SDK.
spark.sql.extension
Here we add the Iceberg SQL extensions that adds additional SQL commands like UPDATE and DELETE. We’ll demo some of these
commands in a later section.
spark.sql.catalog.<catalog-name>
We’ve defined prodiceberg as the catalog name and all properties that start with spark.sql.catalog.prodiceberg are configuring this catalog.
catalog-implsets the Iceberg catalog implementation forprodicebergand is set to store table information in DynamoDB. (There are many other catalog options, such asHiveMetaStore)dynamodb.table-namesets the table name that DynamoDB will use.warehousesets the S3 location to store the data and metadata.
spark.sql.defaultCatalog
This property simply sets prodiceberg as the default catalog for Spark.
Next, let’s create a notebook and start having fun with Iceberg!
Creating a Notebook
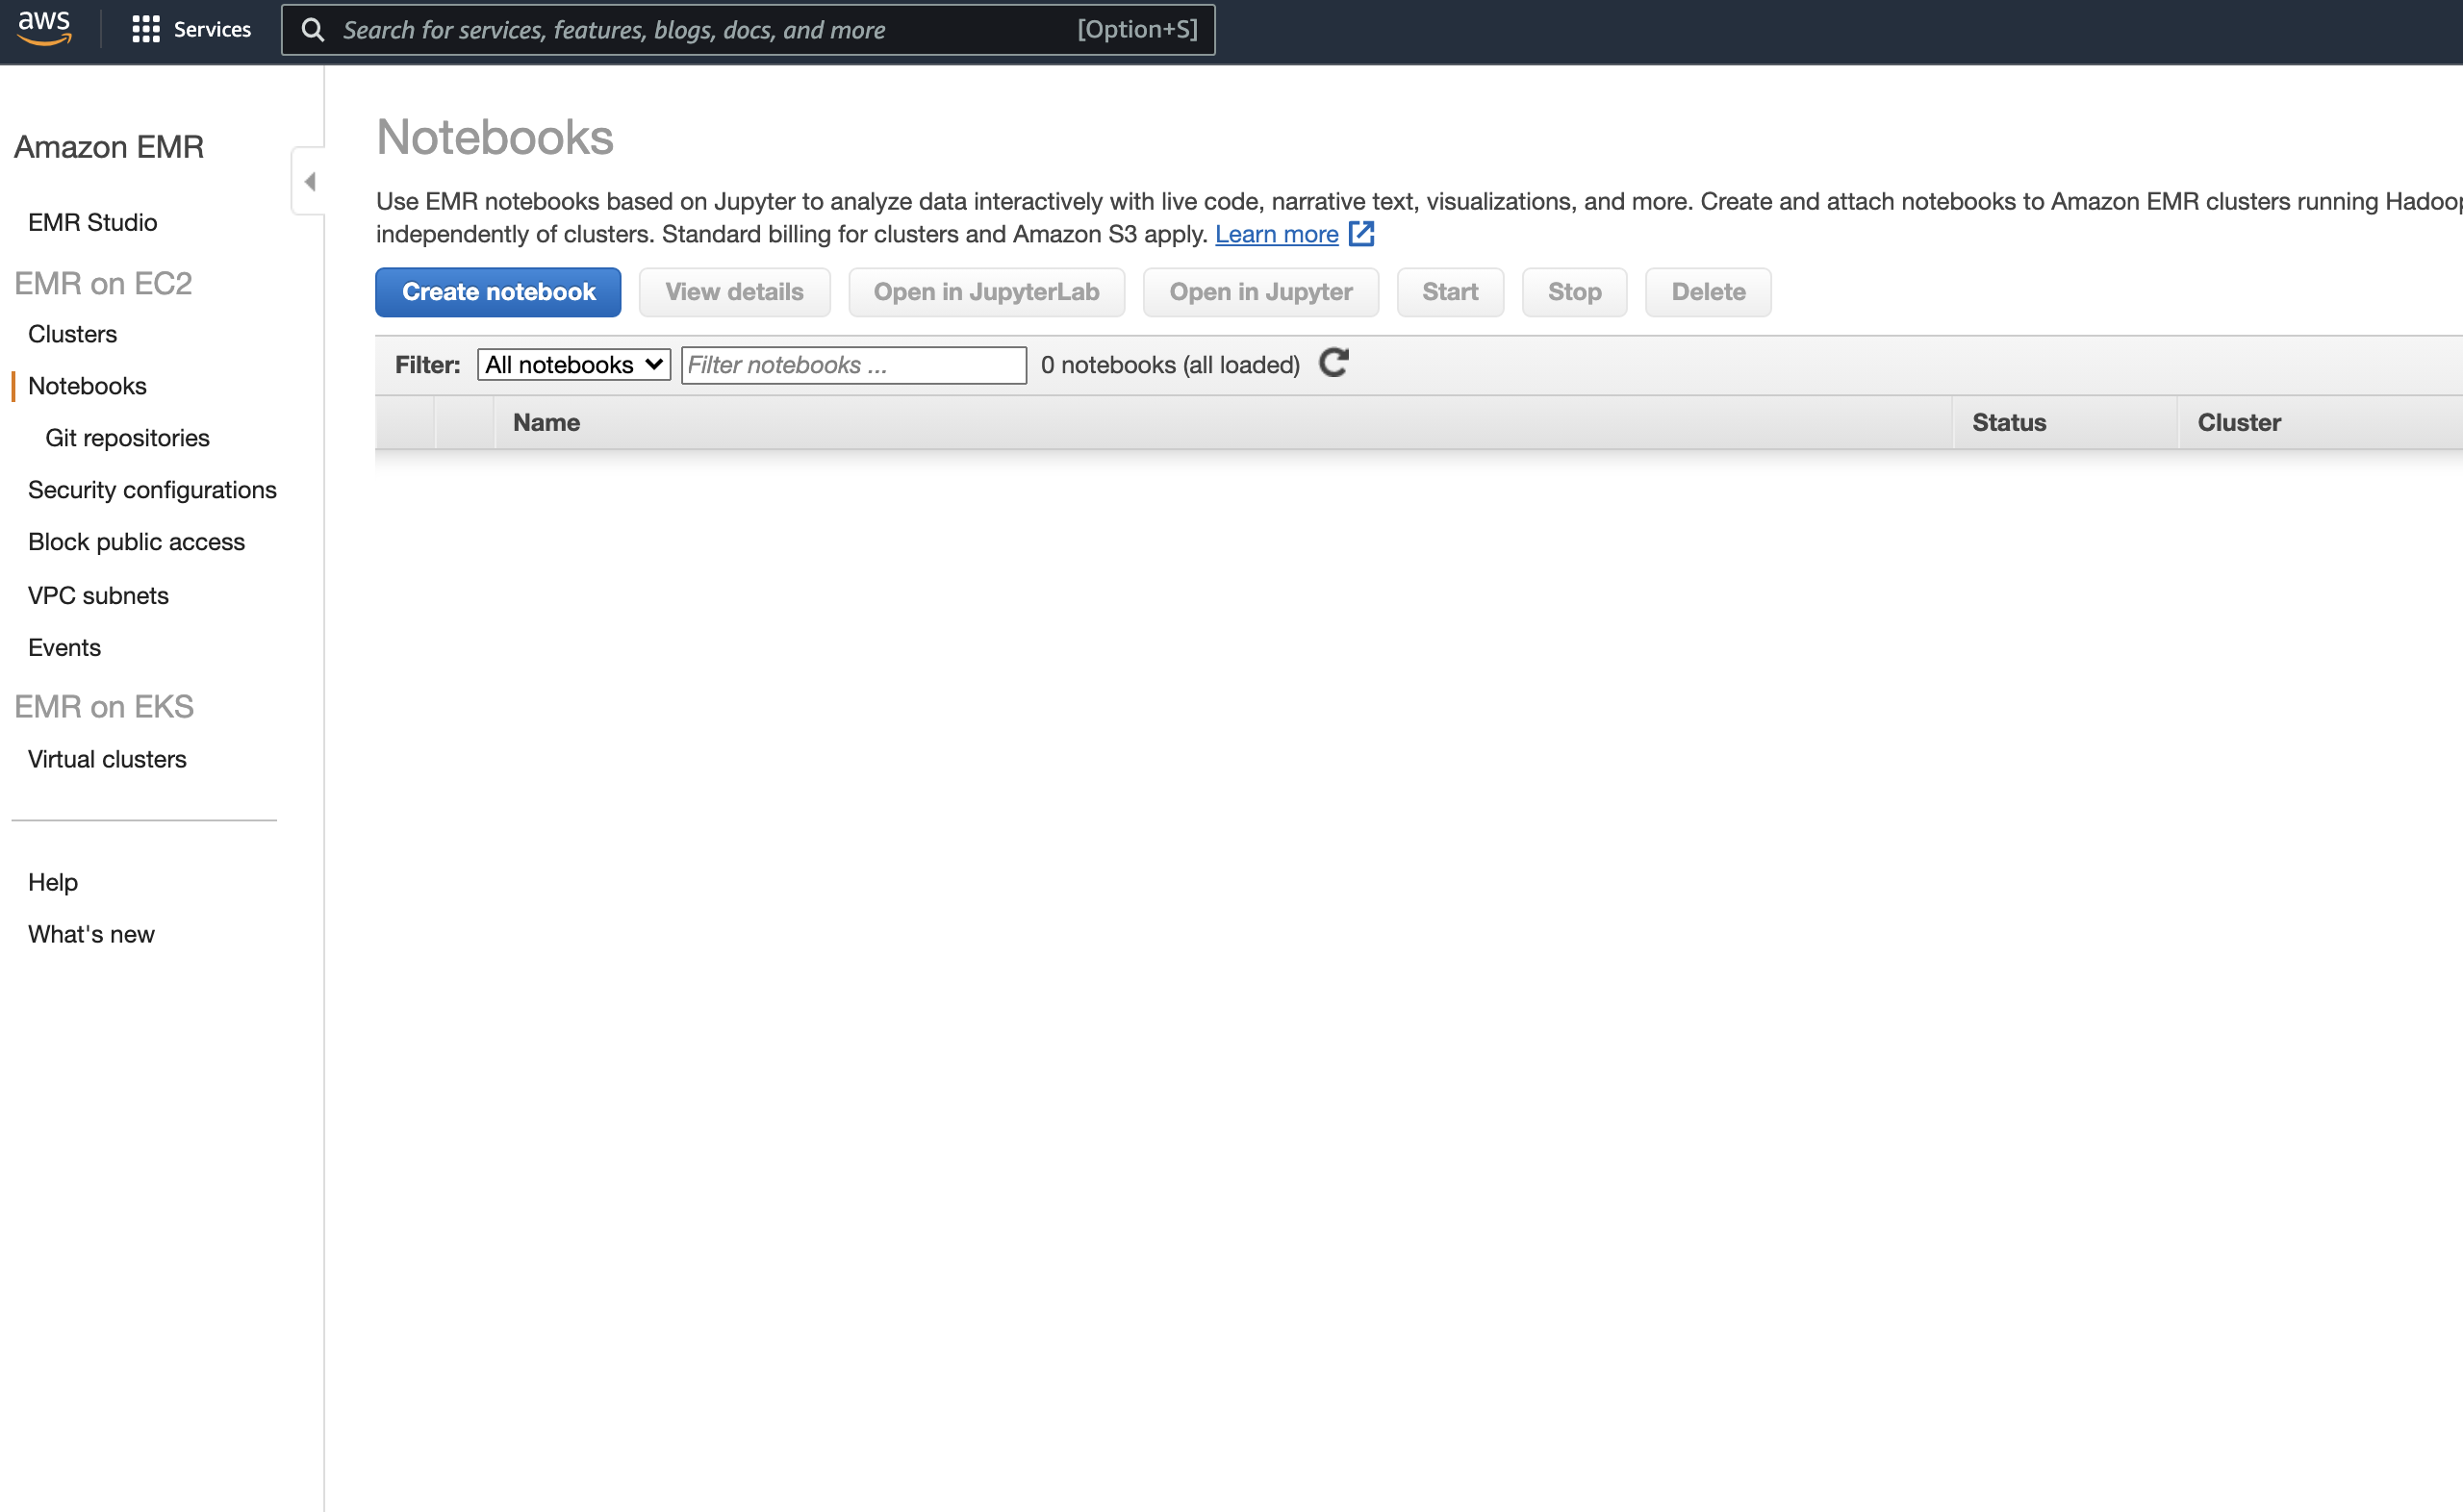
AWS makes it very simple to create a new notebook and attach it to your cluster using Jupyter Enterprise Gateway. On the EMR dashboard in the AWS management console, select “Notebooks” on the left navigation pane.
Next, click “Create notebook.”
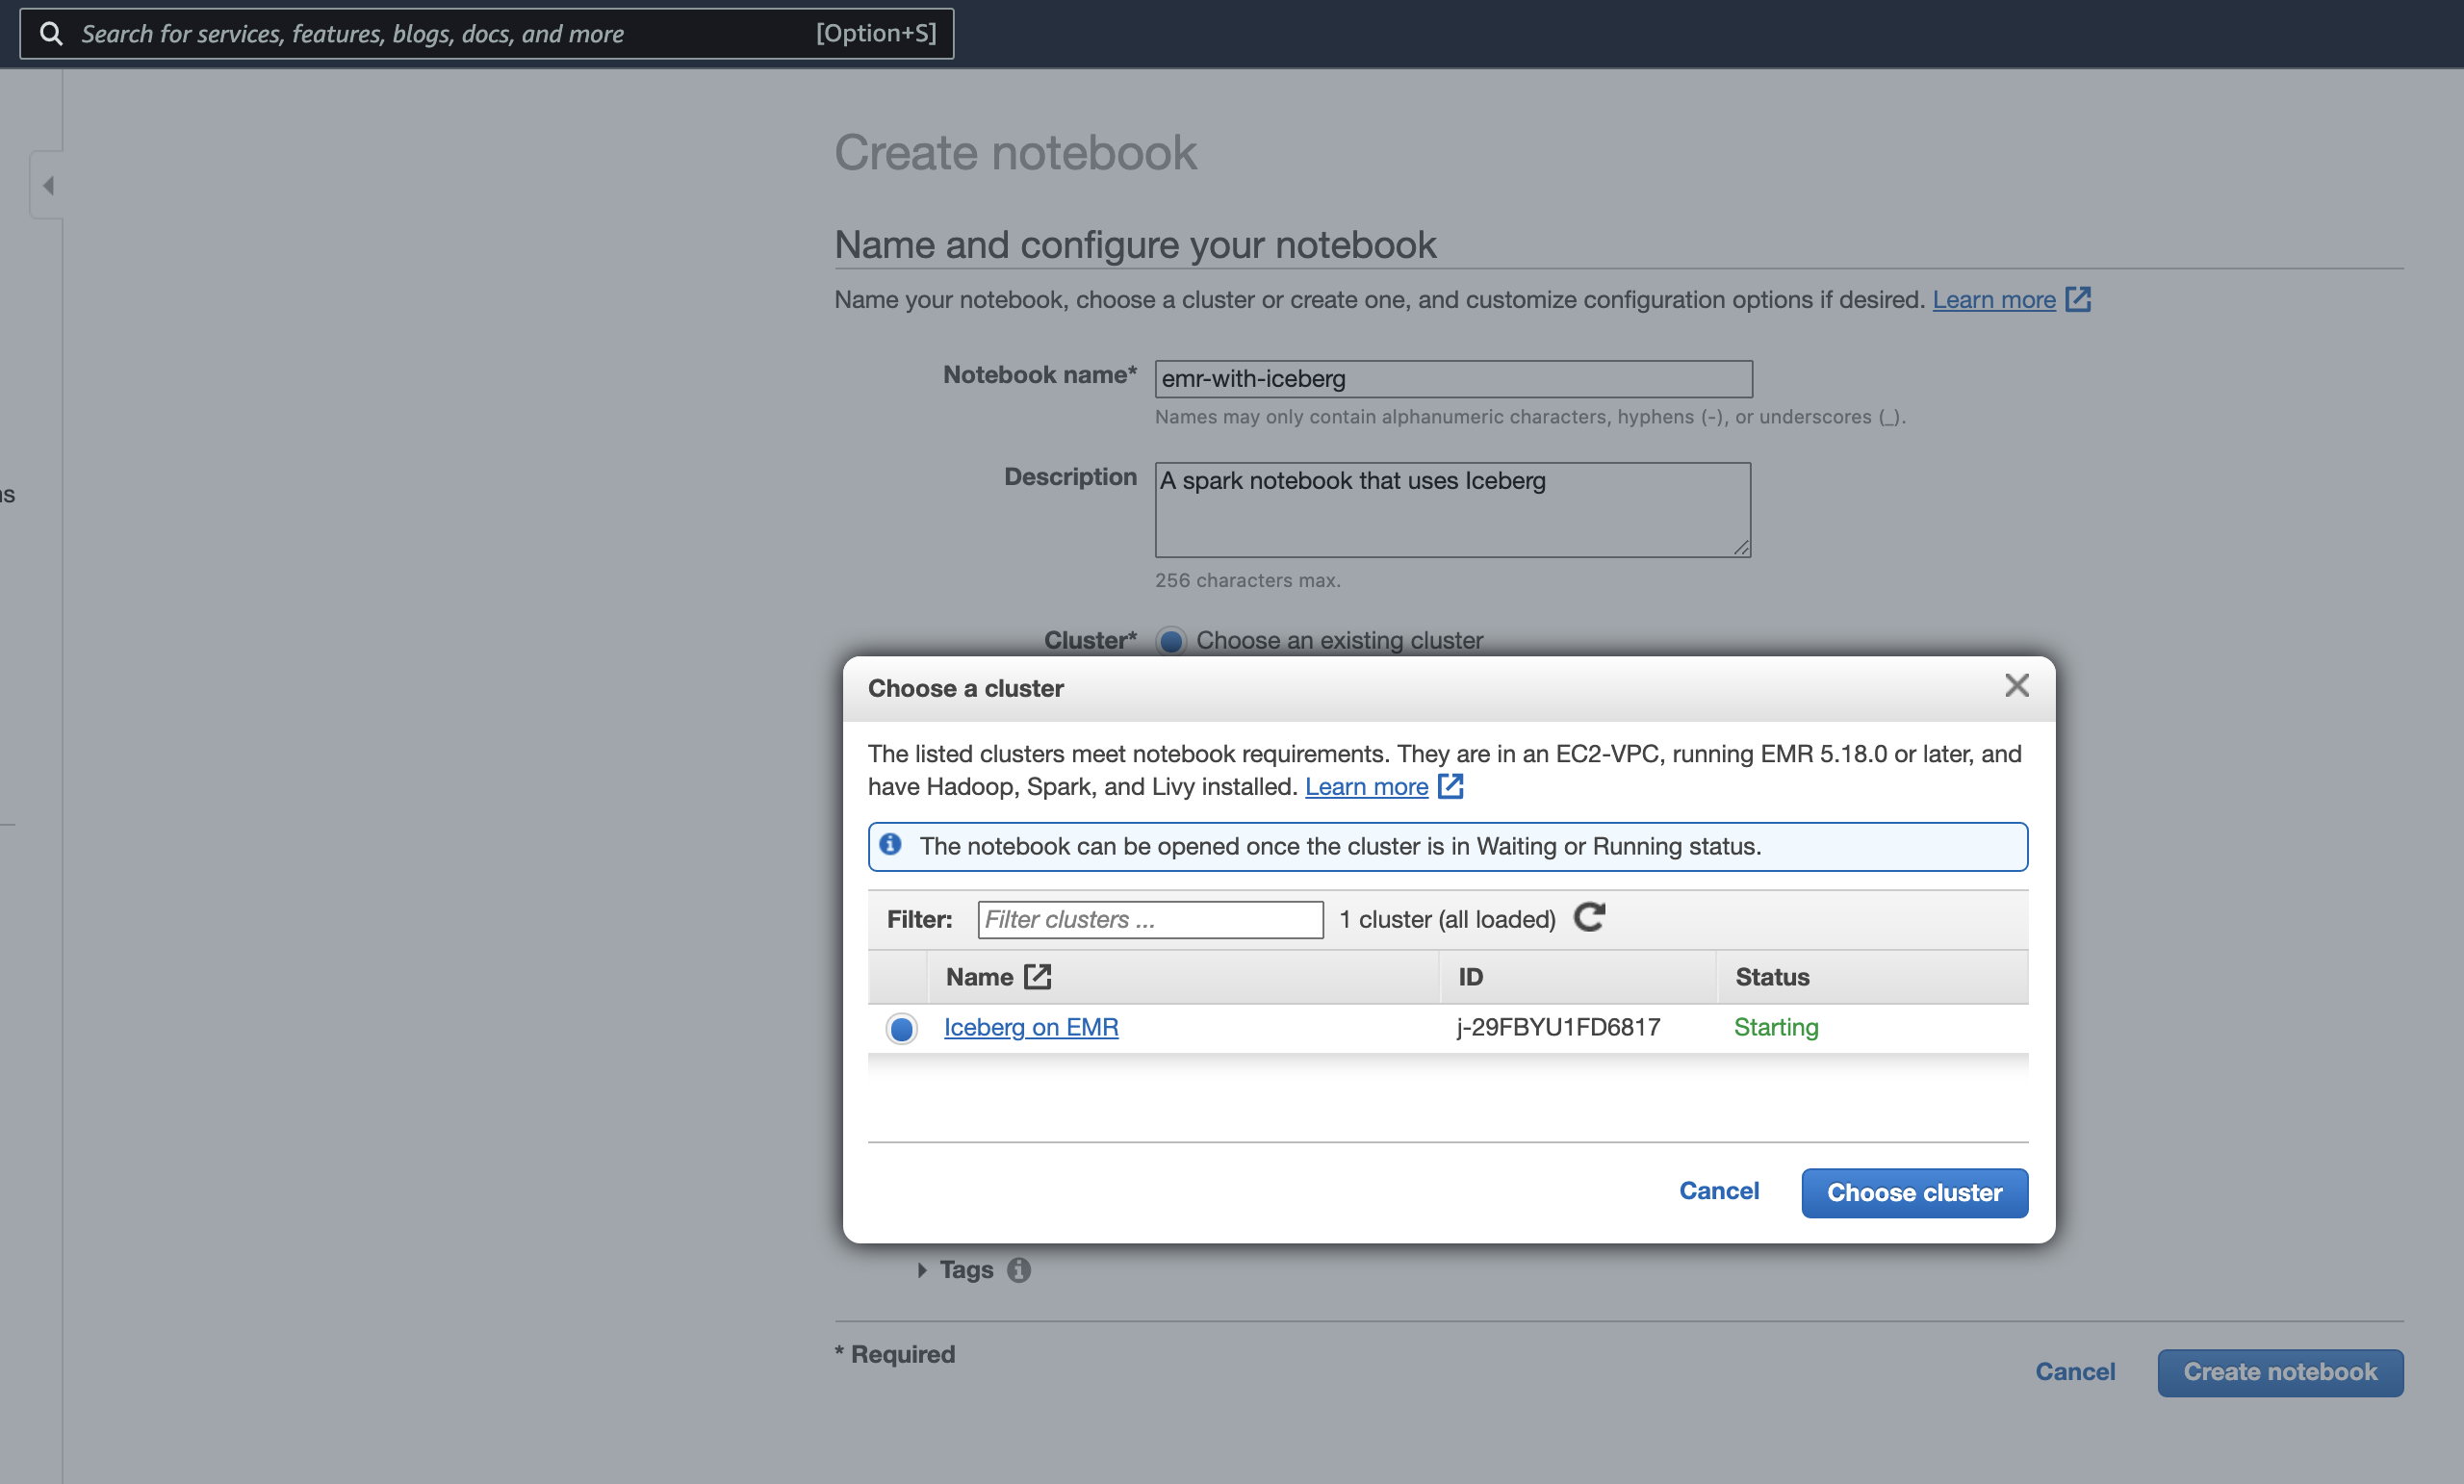
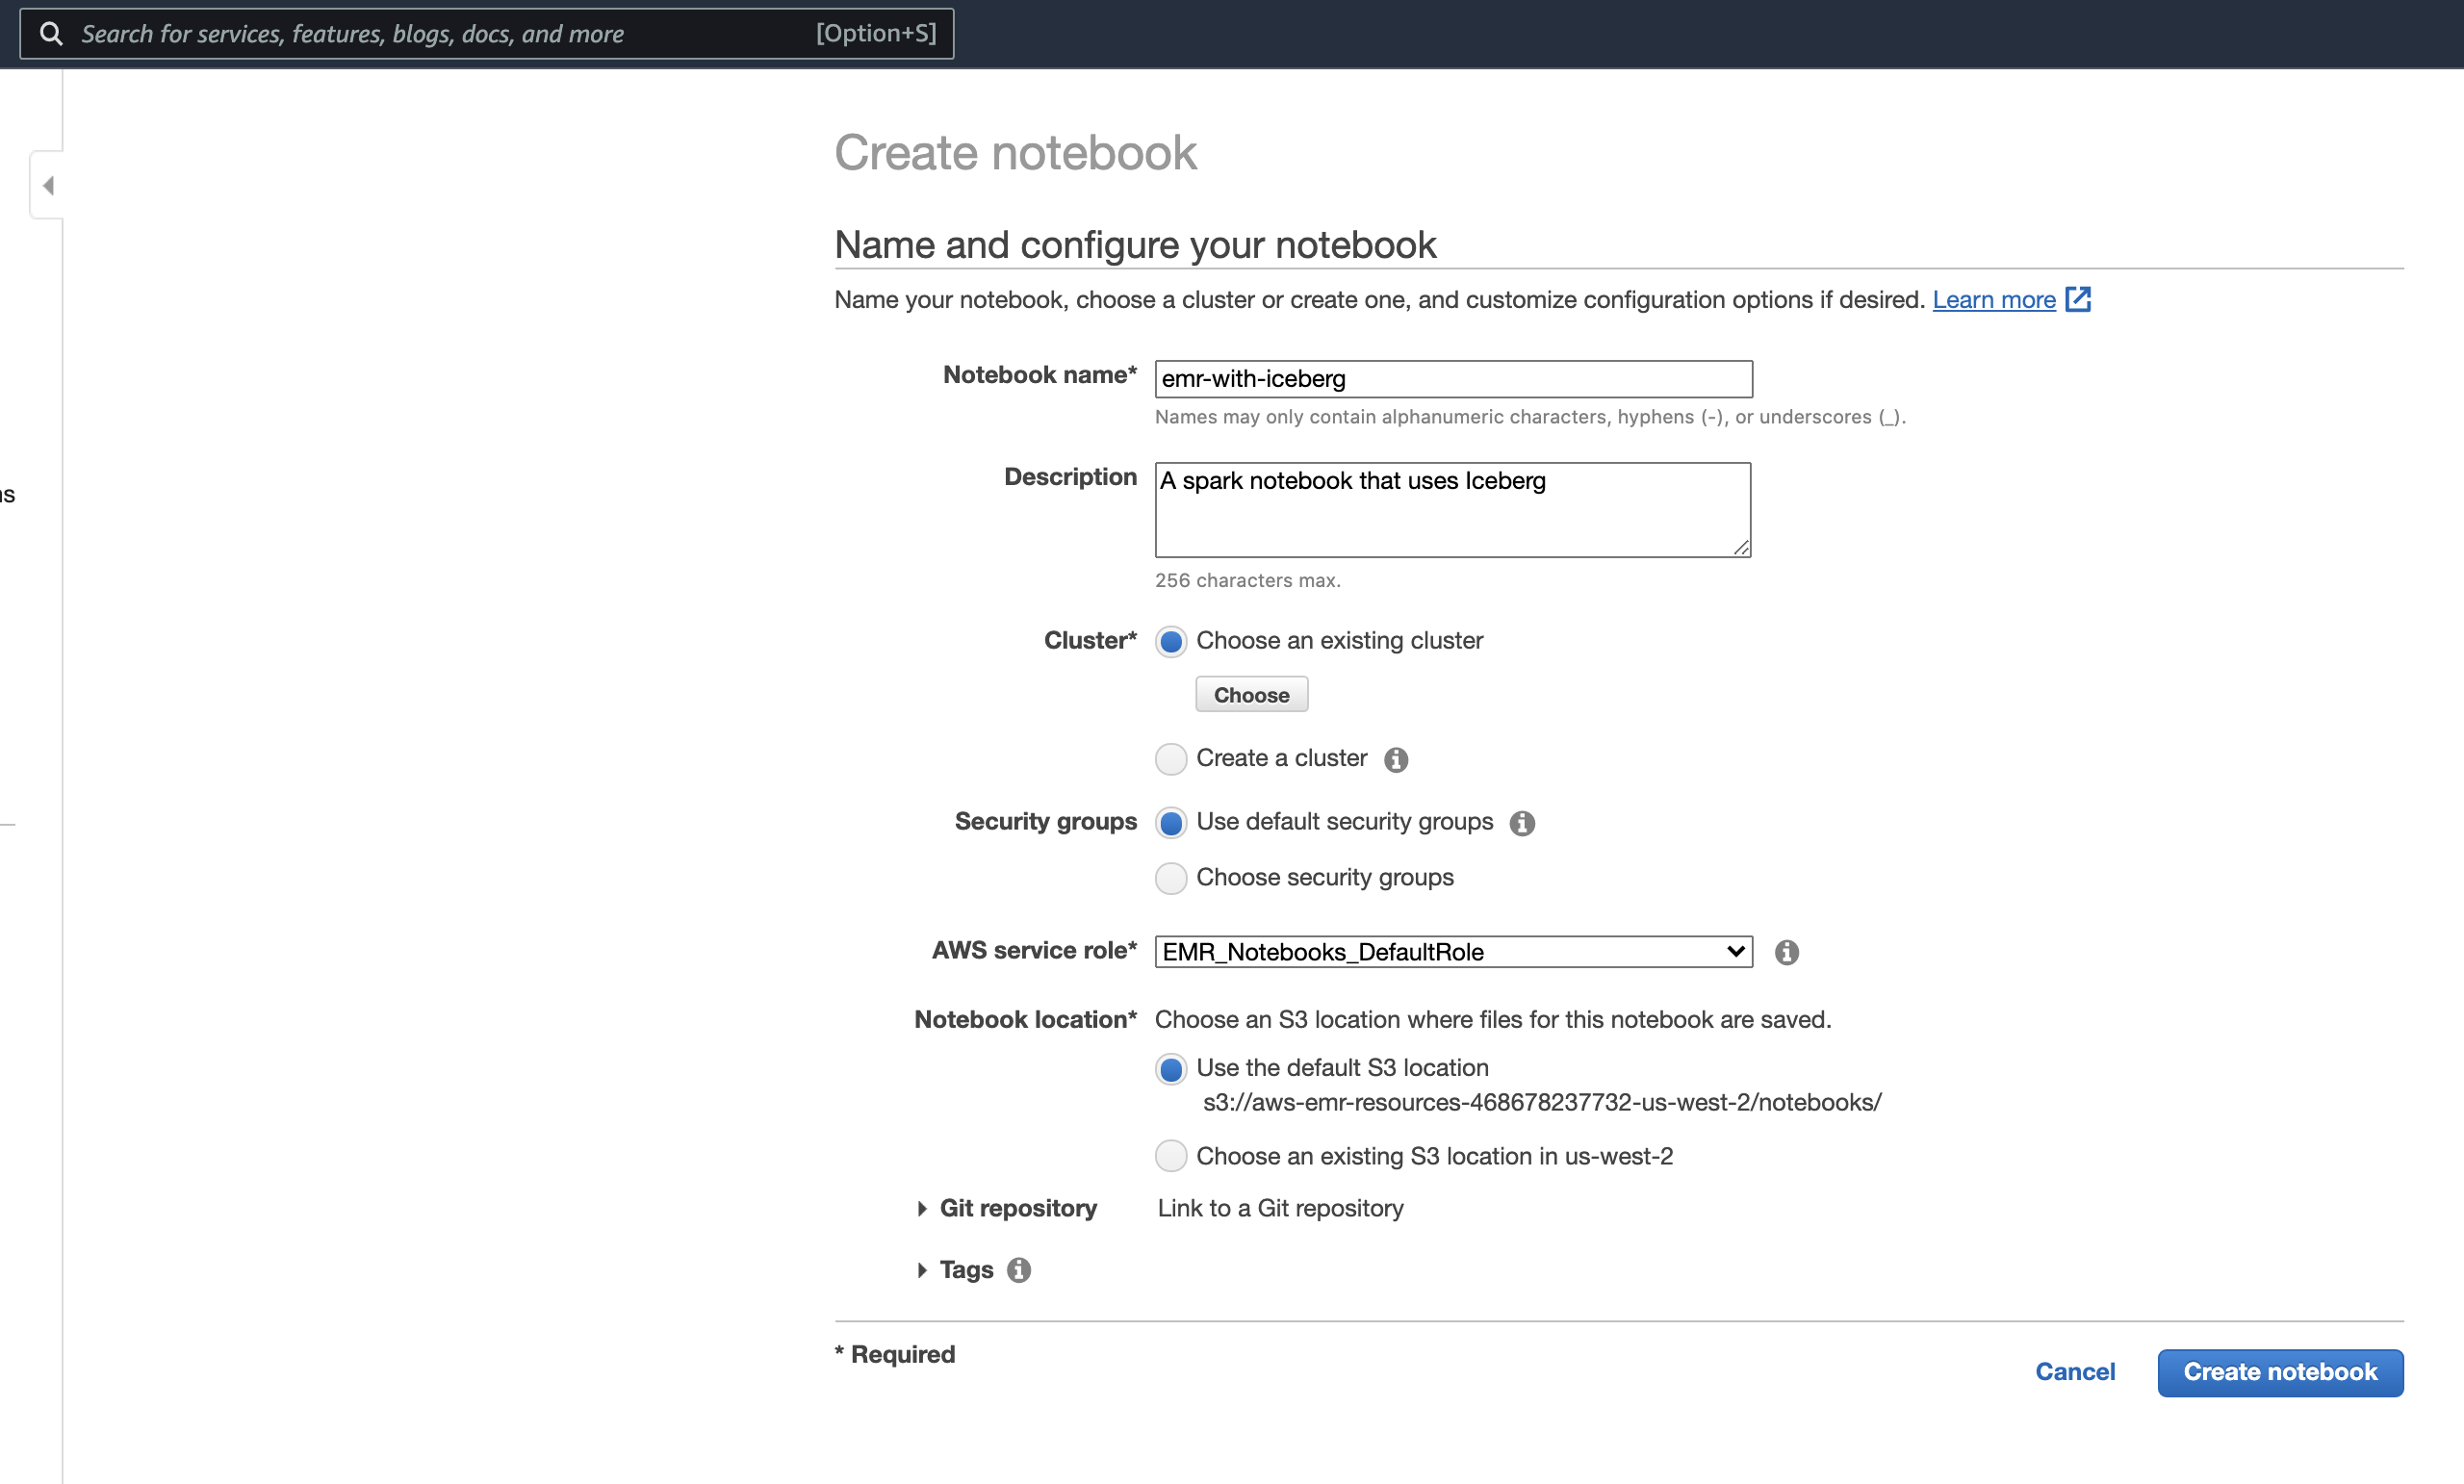
Give the notebook a name (I’ve named it “emr-with-iceberg”), and click the “Choose” button under the “Choose an existing cluster” radio.
The modal that pops up shows all of your existing EMR clusters that are compatible with notebooks. You should see the cluster created earlier. Select it, and click “Choose cluster.”
Finally, click “Create notebook.”
The notebook will be pending while the notebook server is starting up and attaching to the EMR cluster.
Loading Data
Once the notebook is ready, open it up and change the kernel to Pyspark.
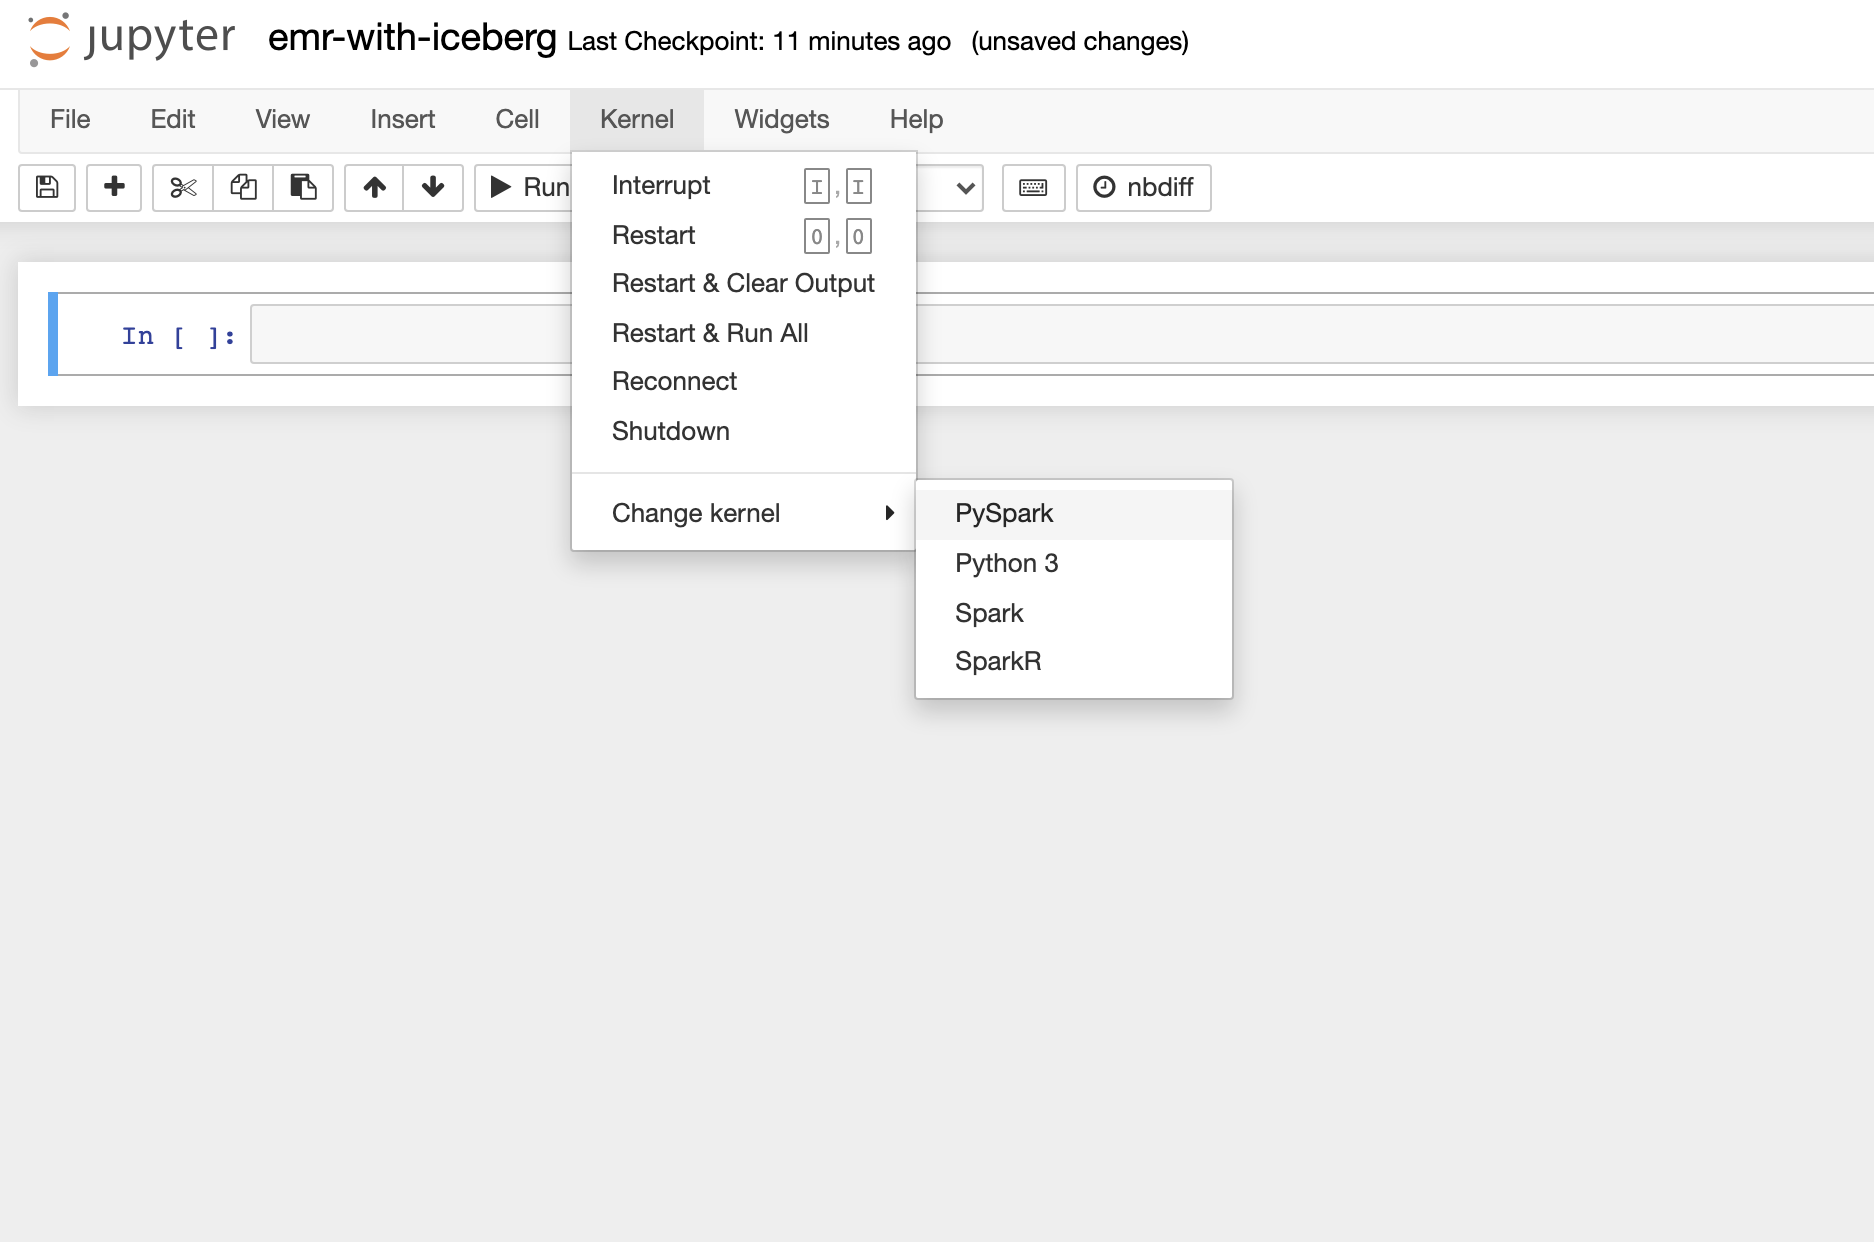
You can then start a spark session by simply running spark in a cell.
spark
For this notebook, we will load the New York City Taxi and Limousine Commission Trip Record Data
that’s available on the AWS Open Data Registry. This data contains information about trips taken by taxis and for-hire vehicles in New York City.
We’ll create an nyc database and save one month of this data into an iceberg table called taxis.
spark.sql("CREATE DATABASE nyc")
df = spark.read.option("header", True).csv("s3://nyc-tlc/trip data/yellow_tripdata_2020-04.csv")
df.writeTo("nyc.taxis").create()
Run a describe table command to see the columns and column types.
spark.sql("DESCRIBE TABLE nyc.taxis").show(truncate=False)
output:
+---------------------+---------+-------+
|col_name             |data_type|comment|
+---------------------+---------+-------+
|VendorID             |string   |       |
|tpep_pickup_datetime |string   |       |
|tpep_dropoff_datetime|string   |       |
|passenger_count      |string   |       |
|trip_distance        |string   |       |
|RatecodeID           |string   |       |
|store_and_fwd_flag   |string   |       |
|PULocationID         |string   |       |
|DOLocationID         |string   |       |
|payment_type         |string   |       |
|fare_amount          |string   |       |
|extra                |string   |       |
|mta_tax              |string   |       |
|tip_amount           |string   |       |
|tolls_amount         |string   |       |
|improvement_surcharge|string   |       |
|total_amount         |string   |       |
|congestion_surcharge |string   |       |
|                     |         |       |
|# Partitioning       |         |       |
+---------------------+---------+-------+
A row count of the nyc.taxis table shows there are 237,993 records.
spark.sql("""
    SELECT COUNT(*) as cnt
    FROM nyc.taxis
""").show()
output:
+------+
|   cnt|
+------+
|237993|
+------+
Row-Level Updates
We now have all of Iceberg’s features at our disposal. Let’s use an UPDATE query to perform some row-level updates. Suppose we found out
that all of the congestion surcharges were actually just a flat $3.50 for this month. We can update congestion_surcharge to $3.50 and also
change total_amount to subtract the existing congestion_surcharge and add the new flat one. Both updates would only be needed for records
that currently have a congestion_surcharge greater than zero.
spark.sql("""
    UPDATE nyc.taxis
    SET total_amount = (total_amount - congestion_surcharge + 3.5),
        congestion_surcharge = 3.5
    WHERE congestion_surcharge > 0
""")
A count shows that the table now contains 184,401 records with a congestion_surcharge of 3.5.
spark.sql("""
    SELECT count(*) as cnt
    FROM nyc.taxis
    WHERE congestion_surcharge = 3.5
""").show()
output:
+------+
|   cnt|
+------+
|184401|
+------+
Time Travel
History tables list all snapshots and the parent snapshot from which they derive. The is_current_ancestor flag lets you know if a snapshot is part of the linear history of the current table.
spark.sql("""
    SELECT *
    FROM nyc.taxis.history
""").show()
output:
+--------------------+-------------------+-------------------+-------------------+
|     made_current_at|        snapshot_id|          parent_id|is_current_ancestor|
+--------------------+-------------------+-------------------+-------------------+
|2021-12-02 23:41:...|7655851632985018025|               null|               true|
|2021-12-02 23:44:...|1326103984451820324|1930340376501382945|               true|
|2021-12-02 23:44:...|8943891383828853591|1326103984451820324|               true|
+--------------------+-------------------+-------------------+-------------------+
You can time-travel using the rollback_to_snapshot stored procedure. Let’s revert the table to the original state by traveling to the very first snapshot ID.
df = spark.sql("SELECT * FROM nyc.taxis.history")
original_snapshot = df.head().snapshot_id
spark.sql(f"CALL prodiceberg.system.rollback_to_snapshot('nyc.taxis', {original_snapshot})")
output:
+--------------------+-------------------+
|previous_snapshot_id|current_snapshot_id|
+--------------------+-------------------+
| 8943891383828853591|7655851632985018025|
+--------------------+-------------------+
Another look at the history table shows that the time-travel event added a new entry with the original snapshot ID.
spark.sql("""
    SELECT *
    FROM nyc.taxis.history
""").show()
output:
+--------------------+-------------------+-------------------+-------------------+
|     made_current_at|        snapshot_id|          parent_id|is_current_ancestor|
+--------------------+-------------------+-------------------+-------------------+
|2021-12-02 23:41:...|7655851632985018025|               null|               true|
|2021-12-02 23:44:...|1326103984451820324|1930340376501382945|              false|
|2021-12-02 23:44:...|8943891383828853591|1326103984451820324|              false|
|2021-12-02 23:51:...|7655851632985018025|               null|               true|
+--------------------+-------------------+-------------------+-------------------+
Checking the table for records with a congestion_surcharge of 3.5 now returns
no results. The table has been successfully reverted to it’s initial state!
spark.sql("SELECT COUNT(*) as cnt FROM nyc.taxis WHERE congestion_surcharge = 3.5").show()
output:
+------+
|   cnt|
+------+
|     0|
+------+
These examples are just scratching the surface of Apache Iceberg’s feature set!
Summary
In a very short amount of time, you can have a scalable, reliable, and flexible EMR cluster that’s connected
to a powerful warehouse backed by Apache Iceberg. S3 persists your data, and there is an ever-growing
list of Iceberg catalog options to choose from.
Check out the Amazon EMR Documentation and the Apache Iceberg Documentation
to learn more!